IDEXX Haematology
IDEXX Haematology resources
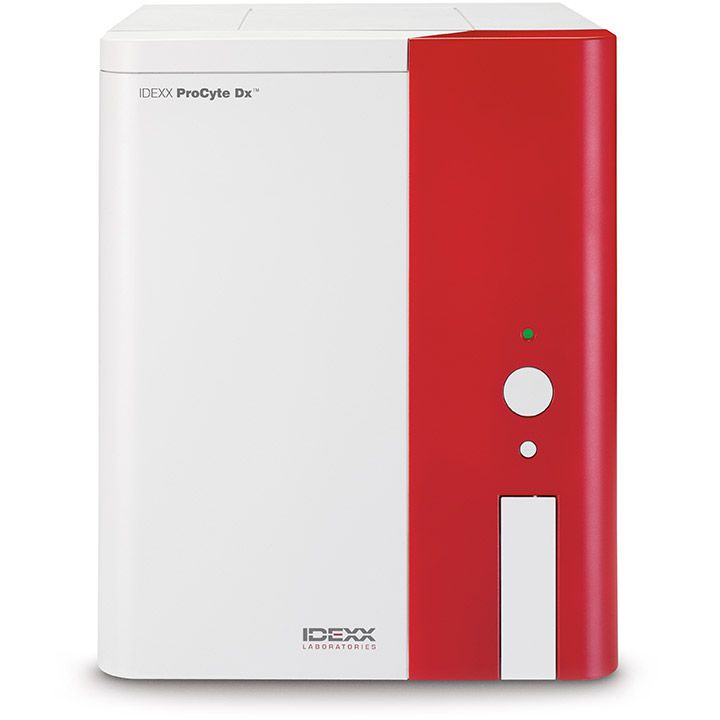
ProCyte Dx Haematology Analyser resources
How to prepare samples for your ProCyte Dx analyser
Blood collection and sample preparation steps
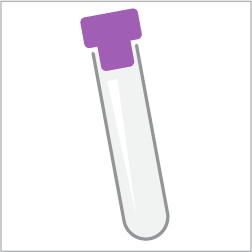
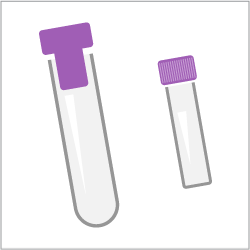
1. Use an EDTA tube that can be secured in the adapter (13 mm x 75 mm, 1.3 mL, 650 μL).
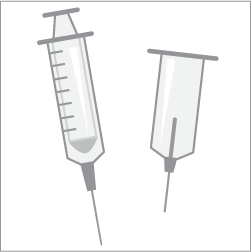
2. Use a syringe or vacuum collection system.
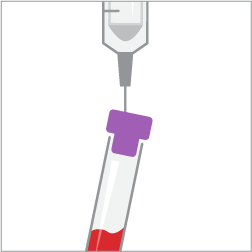
3. Draw the sample and transfer, if necessary.
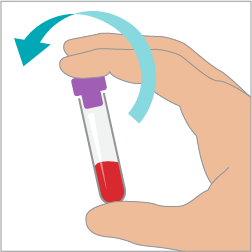
4. Invert the tube to mix.
Complement your in-house haematology with a high-quality blood film
Instructions
- Use fresh, well-mixed, anti-coagulated blood to avoid sample deterioration.
- Maintain an angle of approximately 30° between the spreader and sample slide throughout.
- Spread the sample in one smooth, steady motion.
Tips
- Include a blood film when results do not match clinical expectations.
- Make sure the film has a symmetrical body, a monolayer and a feathered edge.
- Avoid sample deterioration by limiting storage to 4 hours or less.
- Quickly dry slides (air dry or use a fan on the cool setting).
How to run samples on your ProCyte Dx analyser
- Identify the patient and initiate the sample on the IDEXX VetLab Station.
- Place the sample in the ProCyte Dx analyser.
- Press the Start button on the ProCyte Dx analyser and walk away.
Need more help? Talk to customer support today. Call 08 51 989566.
Understanding your ProCyte Dx analyser complete blood count (CBC) results
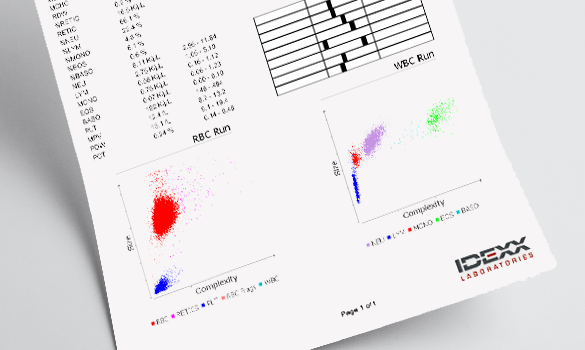
Dot plots
Dot plots can be used to identify abnormalities in patient samples. Each dot represents an individual cell in this critical component of a complete blood count. Viewed together, they provide a snapshot of cellular morphology.

Interpretive aids
Interpretive aids are messages used to provide more insight into CBC results by detecting results-based patterns. Interpretive aids are displayed as messages on the IDEXX VetLab integrated patient report.
Reference intervals
Species-specific reference intervals are displayed graphically on the IDEXX VetLab Station and in VetConnect PLUS.
Maintaining your ProCyte Dx analyser
Run the rinse procedure once a month
- Prepare the 5% bleach solution up to 1 week before running.
- Set aside 25 minutes to complete the procedure.
- Follow the detailed instructions in your operator’s guide.
Note: This procedure removes contaminants and checks analyser performance.
Run a quality control once a month
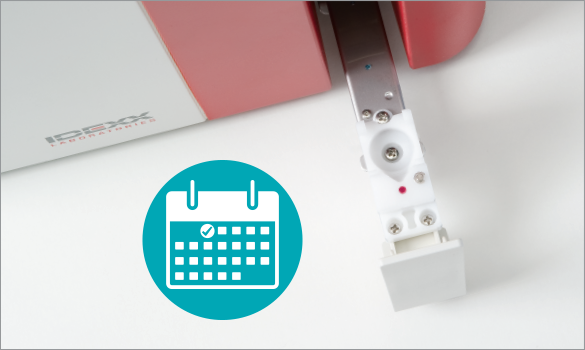
- Use a vial of e-CHECK (XS) maintained at room temperature for at least 15 minutes.
- Set the QC adapter in the sample drawer and insert the e-CHECK (XS) vial.
- Follow the detailed instructions in your operator’s guide.
Note: This QC run ensures the reliability of the analyser and reagent system.
Change the reagent kit when low, empty or expired
- Fold open the top cover; do not alter the order of reagents.
- Avoid damage to the Quick-Connect Top when removing from and placing in bottles.
- Follow the detailed instructions in your operator’s guide.
Tip: To maximise reagent use, on the IDEXX VetLab Station, switch off the “Reagent Low” alert.
Clean the fan filter once a month
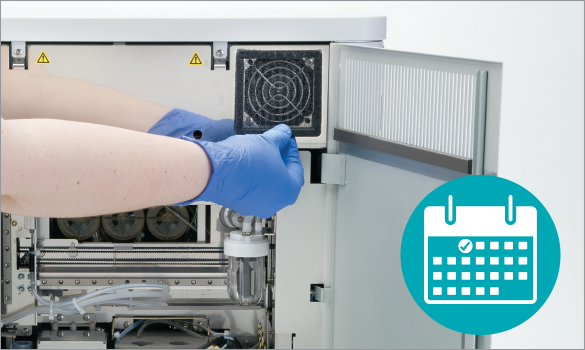
- Turn off the analyser and open the cover on the right-hand side.
- Remove and vacuum the fan filter.
- Replace the fan filter and close the cover.
Tip: Schedule to coincide with one of your weekly reboots.
Frequently asked questions for the ProCyte Dx analyser
A variety of maintenance and diagnostic procedures are required to ensure optimal performance of the ProCyte Dx analyser.
- Once every 24 hours: Place the analyser in Standby mode. When you exit Standby mode, two procedures (an Auto Rinse and a background check) are automatically initiated. These take approximately 8 minutes to complete.
- Every week: Reboot the analyser and the information processing unit (IPU).
- Every month: Clean the air filter, perform the rinse procedure and run the e-CHECK (XS) L2 quality control.
- As needed: Change the reagent kit and stain pack.
For detailed instructions:
Reagent kits, stain packs and testing accessories for the ProCyte Dx analyser are available at IDEXX Online Orders. Simply sign in to your account to order or create an account today.
It takes only 2 minutes to get results from a run on the ProCyte Dx analyser.
Guides for the ProCyte Dx analyser
ProCyte Dx Operator's Guide
ProCyte Dx Quick Reference Guide
ProCyte Dx sample preparation poster
Blood Cell Guide
Analyser Maintenance Log
Support
Contact us
Need more help? Get product answers and information or talk to Customer Support today.
08 51 989566
Training courses
Take complimentary courses on ProCyte Dx analyser operation. Get video tutorials on daily protocols and procedures.
ProCyte One Haematology Analyser resources
How to prepare samples for your ProCyte One analyser
Blood collection and sample preparation steps
1. Use either an EDTA-treated tube or microtube.
2. Use a syringe or vacuum collection system.
3. Draw the sample and transfer, if necessary.
4. Invert the tube to mix.
Complement your in-house haematology with a high-quality blood film
Instructions
- Use fresh, well-mixed, anti-coagulated blood to avoid sample deterioration.
- Maintain an angle of approximately 30° between the spreader and sample slide throughout.
- Spread the sample in one smooth, steady motion.
Tips
- Include a blood film when results do not match clinical expectations.
- Make sure the film has a symmetrical body, a monolayer and a feathered edge.
- Avoid sample deterioration by limiting storage to 4 hours or less.
- Quickly dry slides (air dry or use a fan on the cool setting).
How to run samples on your ProCyte One analyser
- Identify the patient and initiate the sample on the IDEXX VetLab Station.
- Invert the sample tube 10 times to mix and immediately place it in the sample drawer.
- Close the drawer and press the Start button on the front of the analyser.
Need more help? Talk to customer support today. Call 08 51 989566.
Understanding your ProCyte One analyser complete blood count (CBC) results
Dot plots
Dot plots can be used to identify abnormalities in patient samples. Each dot represents an individual cell in this critical component of a complete blood count. Viewed together, they provide a snapshot of cellular morphology.
Interpretive aids
Interpretive aids are messages used to provide more insight into CBC results by detecting results-based patterns. Interpretive aids are displayed as messages on the IDEXX VetLab integrated patient report.
Reference intervals
Species-specific reference intervals are displayed graphically on the IDEXX VetLab Station and in VetConnect PLUS.
ProCyte One reference intervals for the IDEXX VetLab Station
Maintaining your ProCyte One analyser
Take the guesswork out of quality control with IDEXX SmartQC
IDEXX SmartQC Control is a quality-control material specifically developed by IDEXX that is housed in the sample drawer and is run periodically to monitor the performance of the ProCyte One analyser.
You will be prompted to change the SmartQC vial when it is empty or expired.
- Open the sample drawer.
- Remove the empty/expired SmartQC vial.
- Shake a new SmartQC vial vigorously for 10 seconds to ensure it is well mixed and then load it into the rear slot in the sample drawer.
- Close the sample drawer.
Change the reagent and sheath packs
The ProCyte One analyser uses reagent and sheath fluids with every run. These fluids are easily loaded into the analyser as packs and should be replaced when they are empty or expired. You’ll receive a notification on the IDEXX VetLab Station when a pack should be replaced.
- Open the analyser door.
- To replace the reagent pack: Pull to remove the small grey reagent pack from inside the analyser. Then insert a new reagent pack until it clicks into place.
OR
To replace the sheath pack: Pull to remove the large grey sheath pack from inside the analyser. Then insert a new sheath pack until it clicks into place. - Close the analyser door.
Note: The door will not close completely if the pack is not seated properly.
Supplies and pay-per-run
What are the supplies?
These supplies are used exclusively with the ProCyte One analyser:
- Reagent packs
- Sheath packs
- IDEXX SmartQC Control
- Filters
How much are the supplies?
All ProCyte One supplies are offered on a pay-per-run basis. The inventory is provided up front at no charge; you are then invoiced at the end of the month for only those runs performed.
How do I order more supplies?
Procyte One supplies are available at IDEXX Online Orders. Simply sign in to your account to order or create an account today.
Frequently asked questions for the ProCyte One analyser
The ProCyte One analyser is virtually maintenance-free! There are just a couple of maintenance procedures that are required on an as-needed basis (frequency will vary based on analyser use):
- Change the reagent and sheath packs when prompted by the IDEXX VetLab Station.
- Change the filter.
- Perform a bleach clean of the analyser (when prompted by IDEXX Customer and Technical Support).
For detailed instructions:
Reagent packs, sheath packs, IDEXX SmartQC Control and testing accessories for the ProCyte One analyser are available at IDEXX Online Orders. Simply sign in to your account to order or create an account today.
It takes less than 5 minutes to get results from a run on the ProCyte One analyser.
You will be prompted to replace the filter on the ProCyte One analyser approximately twice a year (this varies based on analyser use). An alert will appear on the IDEXX VetLab Station touch screen when the filter needs to be changed. It is important that you only change the filter when prompted or by accessing the procedure found on the ProCyte One Diagnostics screen on the IDEXX VetLab Station.
- Open the analyser door.
- Remove the filter panel.
- Lift up the green latch so that it’s perpendicular to the analyser.
- Pull the filter to remove it from the analyser.
- Load a new filter into the analyser, ensuring the arrow on the filter is pointing up and is aligned with the light grey chamber above it.
- Lower the green latch so that it’s parallel to the analyser.
- Replace the filter panel.
- Close the analyser door.
ProCyte One Haematology Analyser resources
ProCyte One Operator's Guide
ProCyte One Quick Reference Guide
ProCyte One sample preparation
ProCyte One interpretive aids
ProCyte One reference intervals
ProCyte One Pay per Run
Blood cell guide
Interpreting ProCyte One Canine and Feline dot plots
ProCyte One equine dot plots
Analyser Maintenance Log
Product inserts
Safety materials
Support
Contact us
Need more help? Get product answers and information or talk to Customer Support today.
08 51 989566
Training courses
Take complimentary courses on ProCyte One analyser operation. Get video tutorials on daily protocols and procedures.
IDEXX Reference Laboratories haematology resources
Ordering options
The following profiles can be ordered via VetConnect PLUS or request forms:
Routine profiles with large blood count
| Code | Profile |
GCUP/GCUPI |
Check-up large |
GERIP/GERIPI |
Geriatric Profile |
KPGR |
Feline Large Profile |
Routine profiles with premium blood count (canine and feline only)
| Code | Profile |
PRGCUP/ PRGCUPI |
Check-up large with Premium Blood count |
PRGERIP/ PRGERIPI |
Geriatric Profile with Premium Blood count |
PRKPGR |
Feline Large Profile with Premium Blood count |
Standalone tests
| Code | Profile |
BB |
Large Blood Count |
PRBB |
Premium Blood Count standalone |
DIFFPR |
Blood film evaluation |
Choose the right CBC for your patient
- Flagged and/or qualified results
- Anemia
- High/low WBC count
- Low platelets
- SNAP 4Dx Plus Test positive
- Heartworm positive
- FeLV or FIV positive
- Preanesthetic blood work on clinically healthy animals
- Anemia
- High/low WBC count
- Unexpected findings on chemistry or serology
- FeLV or FIV positive
- Vector borne disease positive
- Heartworm positive
- SNAP 4Dx Plus Test positive
Training courses
Take complimentary courses, and get video tutorials on daily protocols and procedures.